There are about as many different sauces/flavours/spices for wings are there are grains of sand on a beach. For my first batch, I thought I would keep it simple and use my homemade Sweet n' Stickey Sauce (check out the recipe from my older post). The rest, however, is original. Here's how it goes:
Step 1: Make the marinade:
- 1/2 Cup White Vinegar
- 1 TBSP Chili Powder
- 1 TSP Cayenne Powder

Step 2. Rinse and dry the wings - this recipe used 15 wings - if you are going to use more, double the marinade.

Step 3. Put the wings and Marinade in a Freezer Bag, smoosh around and let it refrigerate for 2 hours
 Step 4. Once the wings have absorbed the vinegar and spice, drain them in a colander and discard the marinade
 Step 5. Drizzle some oil over the wings and toss to coat.
 Step 6. Prepare your BBQ. Below you can see I'm using my Weber Charcoal Kettle with a full Chimney of charcoal.
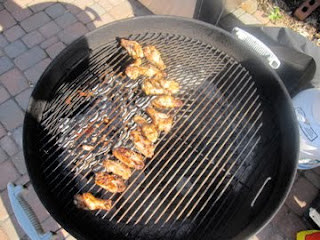
 Step 7. Prepare a 2-zone fire. As you can see below, the heat is focused on only one side of the BBQ. This will enable us to use high heat, when needed and indirect heat later on. You can achieve the same effect on a gas grill by using only 1 burner.
Step 8. Place the wings directly over the coals and flip/toss often to avoid burning. Keep them over the high heat for about 10 minutes so the skin gets crispy
 Step 9. Move the wings to the edge of the coals so the are on indirect heat. Let them cook here for another 10 minutes, turning over every few minutes.
When the wings are cooking on the cooler side of the BBQ, you can cover them up to protect the heat.

Step 10. Sauce the wings. Use the sauce from my blog on Sweet n' Stickey Chicken n' Ribs Sauce. Let them cook for another 10 minutes; turning and saucing as much as you desire.
 Here is the finished product:
 These wings were very tasty. I had initially thought the vinegar, chili, cayenne marinade would add more heat, however it simply added some flavour. To add heat, we'll have to kick it up a notch next time. All in all, these wings were sticky, crispy, juicy, and delicious.
Happy BBQ'n
Seb


